The Integer Amplifier

This post is an introduction to tintamp, the integer amplifier. The goal of the tintamp project is to build a free software guitar modeller for low resource computers such as digital music players or modern high performance microcontrollers. The focus on low resource devices defines much of the character of the project from its choice of implementation language to the relatively simplistic, and therefore CPU-friendly, DSP engine. These devices also mandate unusual features such as the no malloc() mode and the use of purely integer arithmetic operations (a.k.a. fixed point) from which the project gets its name.

To provide even more focus and to make it easier to ‘complete’ the project I have picked two platforms to be reference devices. These are the first devices I expect to port tintamp to. Both devices require a little hardware hacking as well as the tintamp software so there will be a substantial element of learning as I go.

Target 1 – Sansa Clip Zip

From a hardware perspective this is a simple mini-project to convert an off-the-shelf digital music player into a headphone practice amplifier. The digital music player in question is the Sanza Clip Zip made by Sandisk.

From the point of view of this project it has good many things going for it. In particular it has audio inputs that can be tapped into by de-soldering either the built in microphone or FM radio chip. It also has a colour display, a 250MHz ARM9 CPU and,crucially, a mature Rockbox port. The Rockbox port means I can concentrate on the signal processing code without having to work very hard getting the rest of the hardware to work. Even better, these devices are really cheap, so much so that I’m seriously contemplating buying a second one to keep and use for its original purpose.

The only problem with the device is the noise floor. The microphone is probably too noisy too use at all and even with the FM radio’s line in things are only 12dB better. Still, when finished this device will be a headphone practice amp so there’s little need for studio quality effects. It just has to be playable.

The most significant technical limitation of this platform is the absence of FPU making this device is the main motivation for (optionally) using fixed point arithmetic.

Target 2 – STM32F4-Discovery

This time around the mini project it to take a demo board based around a very powerful modern micro controller, combine it with a good quality codec chip and build a digital effects pedal.

The discovery board from STMicroelectronics[1] brings most of the pins of ST’s STM32F4 controller and brings them out to header connectors. This includes the I2S (digital audio) in/out needed to interface it to a codec chip. Alternatively the board has built-in audio output together with a USB on-the-go controller that allows a USB audio device to be connected up.

The STM32F4 is based around a 168MHz ARM Cortex M4 which, although restricted to only the Thumb2 instruction set, does have a floating point unit. Here the big restriction is that being a micro controller there is only 192k of RAM. This will have to be very carefully managed. On the other hand what memory there is should be very fast compared to the CPU so no performance will be wasted with cache misses.

[1]
In the interests of full disclosure I should probably mention that I work for STMicroelectronics. However I don’t work in the microcontroller group and I didn’t pick the Discovery board because it was made by ST. I picked it because the board is fast, cheap and has I2S pins. Likewise, however much I ask my manager, I don’t get the board for free; I have to pay for it like anyone else. While disclaiming things I should also add that nothing in this blog comes from my employer. I’m not authorized to speak on their behalf and all opinions expressed here are purely my own.

Share

De-gunking a thirteen year old Coleman stove

We finally decided enough was enough with the behaviour of our aged but much loved/abused Coleman 424 stove. It was kill or cure time! To explain, Coleman petrol stoves really are brilliant. However if you run them for too many years on neglect and unleaded they start to clog up. In the case of our Coleman it has reached the stage where it eats generators for breakfast. They last maybe three days camping before they are as clogged and gummed up as the one they replaced resulting in a anaemic flame with boil times of around twenty minutes, if ever.

However we want to give it a fighting chance so we’ve given it a new generator and given the tank the cleaning it should have had eight years ago.

After examining it we could hear what sounded like sand in the fuel tank. It has certainly never had sand put in it but it has been laid idle for long stretches of time with a full tank of unleaded. Apparently this lines the tank with varnish which then flakes off and clogs the generator.

The Coleman website suggests a long soak in meths for this problem so we duely filled the tank and left it for twenty four hours disturbed only by the odd shake. Then we siphoned the tank, poured the meths back into the bottle and were left with this.

image

Noting that the jar in the picture above is upside down should give you some idea of just how sticky the sludge in the tank was. Even shaking the jar has little effect. No wonder the generator kept blocking up! I was so pleased with my new sludge I immediately refilled the tank with meths and siphoned it out twice more. After doing this there was nothing to be heard in the bottom of the tank.

We’ve all recently discovered a fuel called Aspen 4T. Its designed for strimmers and other hand held petrol tools. It’s selling point is a much cleaner burn than regular road fuel. It certainly smells better when you run the cooker! Aspen is about twice the price of unleaded or to put it another way between half and a quarter of the price of Coleman fluid. We plan to make it our fuel of choice for our Coleman kit.

So did all this bustle, activity and alternative fuel actually work? We don’t really know yet. We’ll let you know when we get back from our next camping trip.

Share

Fedora preupgrade with a tiny /boot partition

This post is for people with, well, mature, installations of Fedora. The installers of yesteryear defaulted to a very small 250MB /boot partition. That’s so small it really gets in the way of using Fedora’s preupgrade feature.

These are the tricks I use whenever I’m upgrading one of these mature installations.

Firstly you must remove every kernel except the one you are currently using to run your system. That should clear out enough space for preupgrade to get things ready for you.

Even with the kernels removed preupgrade stil won’t have enough space to store the stage2 installer image. That’s it can download it during the install. When preupgrade completes you can reboot, select “Upgrade” via grub (if it is not selected by default) and try to do the upgrade.

Round about now you will discover the second problem. Even with a wired connection you can’t download the stage2 installer. Why not? Well, because preupgrade has incorrectly setup the kernel boot line causing the stage1 installer to try and download the image from the wrong place. You can fixup the kernel boot line using grub’s editing tools. Have a look for the parameter that tells the stage1 installer where to download stage2 and remove /LiveOS/squashfs.img from the end (stage1 automatically appends this).

With this obstacle knocked down you’ll encounter the third and final issuette. When anaconda scans the system to check there is enough disc space to complete the install it can’t find enough space in /boot. Now, by far the biggest thing inĀ  /boot right now is the stage1 installer image which has already been copied to RAM. In otherwords if you can delete it from /boot before anaconda checks there’s enough space then the upgrade process will finally work! If you have an encrypted root filesystem this is no problem because you have to enter a password before the space check. If you don’t have any encrypted partitions then you’ll have to be the worlds fastest typist to beat the space check. Good luck!

These are the commands needed to delete the preupgrade stage1 installer:

mount LABEL=/boot /boot
rm /boot/upgrade/initrd.img
 rm /boot/upgrade/vmlinuz
 umount /boot
 rmdir /boot

Note that you may have to tailor the initial mount command if your /boot partition is not labeled /boot.

Finally don’t worry about the wanton destruction of the stage1 files. As I say they are already loaded into RAM and if for some reason the upgrade still don’t work and you need to reload them a try again then you can just re-run preupgrade.

Have fun…

Share

My first diddly bow

This is a picture of my first ever diddly bow. It was constructed from ash and is primarily made using an axe with a little help from a saw and a knife. The axe is even used to drive the tuning wedge. Can you tune your instrument with an axe?

image

I set this up at a recent bush craft training weekend (which was, as ever, an excellent weekend). You can tell I was listening to the training because I identified the tonewood used to make it by the fungus growing on it. This is not a recognised techiniue for identifying a guitars tonewood!

Continue reading “My first diddly bow”

Share

Extracting text from the memory image of a running process

I found a really nasty problem with the bug tracker we use at work last week. If someone else posts to it whilst you are composing your comment it refuses to accept it. It doesn’t offer a “post comment anyway” feature and advises instead that you:

  • Press Back
  • Select the comment you have just written
  • Copy it to the clipboard
  • Reload the page in your browser
  • Paste the comment back into the text field

Other than the obvious epic fail regarding usability there is one additional problem in the instructions above. When you press back the rich text editing widget no longer has your comment in it! That’s right. Forty five minutes expressing my highly insightful view point as clearly as possible… gone.

Grrr…

I could tell the text was still there because I could press Forward and refresh but I just couldn’t see it.

At this point I fired up wireshark to try and capture my work as it went out over the network. This was when I realized that the bug tracker was using SSL and trying to launch a man-in-the-middle attach on myself was likely a waste of time.

So, the last resort of the desperate(ly lazy) is to grab the data from the memory image itself. That should be dead easy, I’ve been running GNU/Linux at home for almost fifteen years. I must have learnt my way around by now. Surely I just attach to a running process and dump its memory.

Having got the PID of the firefox process I fired up gdb:

 butch$ gdb
 GNU gdb (GDB) Fedora (7.3.50.20110722-10.fc16)
 Copyright (C) 2011 Free Software Foundation, Inc.
 License GPLv3+: GNU GPL version 3 or later
 This is free software: you are free to change and redistribute it.
 There is NO WARRANTY, to the extent permitted by law. Type "show
 copying" and "show warranty" for details.
 This GDB was configured as "i686-redhat-linux-gnu".
 For bug reporting instructions, please see:
 .
 (gdb) attach 23639
 Attaching to process 23639
 /usr/lib/firefox/firefox (deleted): No such file or directory.

At this point I tried the gcore command. No luck there either. gdb couldn’t figure out the memory ranges it needed to dump. Still I’m not one to give up. After trying and failing to scan /proc/23639/mem I decide to scan the list of the memory mappings and dump each one. When I discovered that firefox had over 700 blocks of mapped memory I decided to generate a gdb script to dump the memory automatically:

cat /proc/23639/maps \
| cut -d' ' -f1 \
| tr '-' ' ' \
| awk '{ print "dump memory core-" $1 "-" $2 " 0x" $1 " 0x" $2 }' \
> dumpmem.gdb

It worked. I have the memory in files. From here things get much easier:

cat core-* | strings | grep -C 40 BD-ROM | less

Yay.

Share

Washburn Mercury Series Tonewood

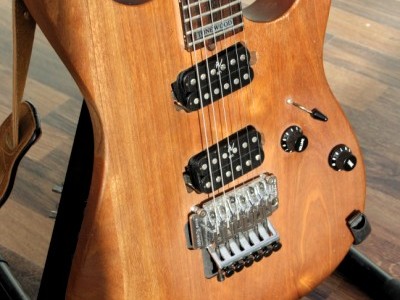
This is my recently acquired Washburn Mercury Series Tonewood electric guitar. Its a limited edition run from the mid nineties, with a mahogony body and a maple neck. As far as I can tell its entirely stock with its original coil tap on the bridge pickup controlled by the push-pull tone knob.

As you can see above the colour of the wood depends heavily upon the lighting. The final two photos, which were taken in the shade, give the best impression of the instruments real colour.

Share